NOTE: this page is outdated. While the concepts still apply, the screen captures and details are from older versions of the software.
Warning: Downloading maps to your GPS will erase any maps that you currently have stored on your SD card. This does not apply to built-in maps that are installed from the factory on many GPS models. Take steps to backup this data, or make sure you have the capability to reload it before you proceed. Do not attempt to download maps to a GPS that has a Garmin SD card that came preloaded with maps. Downloading maps to a pre-loaded SD card may erase all existing map data on the card.
Why?
Garmin stores all maps in a single file on either the micro-sd card or main memory. Some GPS models have two storage locations (nuvi 500), and some only have a single storage location (60Csx). Each storage location can store a single set of maps. Downloading a new mapset to a storage location will overwirte the file and eliminate all mapsets that were previously stored in that single file. Mapsets on different storage locations will not be affected. If your GPS has multiple storage locations (e.g. micro-sd and main storage) then the mapsets on each of these storage locations are combined for display on your GPS. Built-in maps that come pre-installed from the factory by Garmin are not affected,
Considerations for the autorouting variant of our map.
Starting with V1.15, the map that gets installed into Garmin Mapsource is an autorouting map. Using MapSource, you can combine this autorouting map with other maps and download them to your GPS. Your GPS will be able to route you along snowmobile trails using this map. Also, use of the routing tool in MapSource will create and display routes along snowmobile trails just as a routing automobile map will route you along highways and roads. The directions tab of the MapSource routing details will display turn by turn directions along snowmobile trails.
Overview
Our trail maps are transparent, so they can be displayed simultaneously with other maps on your GPS. For example, if you use Garmin TOPO 2008 topographic maps you can load both the topographic maps and our trail maps onto your GPS. The data from both maps are visible at the same time on your GPS map display and they work quite nicely together. You can use the map setup feature of your GPS unit to toggle between the types of map data displayed. Some experimentation is required to get the best usage out of you maps when out on the trails. When viewing maps with Garmin MapSource, you can only view one map at a time.
Installation of maps on your computer
|
Menu Item |
Use |
|
Check for Updates |
Checks with our server to determine if you have the latest map and if any updates are avaiable. |
|
Uninstall Maps |
Click here to uinstall the product from your computer. |
|
View License Agreement |
Legal information on use of our map products. Contains important warnings about proper use. This is the document that you agreed to read when you installed our map. |
|
Trip planner |
Browser link to a online Google-Maps application designed for planinng snowmobile trips. |
|
Trip Planner Help |
Browser link to a online help pages on how to use the Trip Planner tool |
|
Select Optional Trail Colors & Styles |
Runs an application that allows you select different colors and line styles used to depict snowmobile trails both in Garmin MapSource and on your GPS. |
|
Download Snowmobile POI files to GPS |
Our snowmobile maps include custom POIs that you can download to your GPS. When you run this program, the snowmobile specific POIs will be found under your POI EXTRAS category. |
|
Download Autorouting map to GPS |
Runs a wizard that copies the autorouting trail map to the GPS main or optional storage drive. Overwrites garmin/gmapsupp.img in that location that already may contain optional maps. This is useful if you do not have Garmin MapSource. |
|
Help |
Browser link to both online and offline help file pages. Your internet browser must be accociated with files of type .htm for this link to work. |
Viewing your BackWoodsGPStrails map with Garmin MapSource
The rest of this document assumes that already have the Garmin MapSource program installed on your computer. It is a good idea to download the lastest version of the MapSource program. If you are not familar with MapSource you can learn more about by downloading a MapSource tutorial.
Start MapSource as you would normally do on your computer and continue with the steps below to install our map on your GPS.

Figure 2: Starting Garmin MapSource
MapSource will open up (to the last map you had displayed) as depicted in the Figure 3 below..
 zz
zz
Figure 3: MapSource open to Trip and Waypoint Manager map
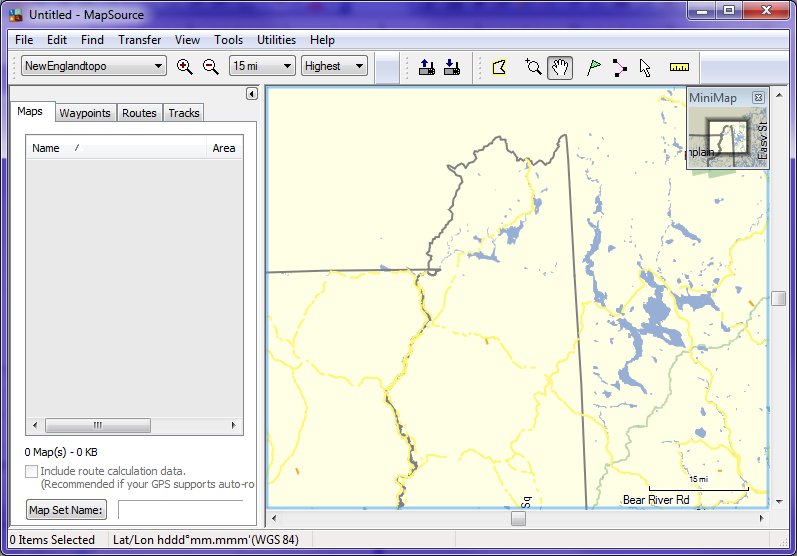
In this case, the map being displayed is "Trip and WayPoint Manager v3", but it could be whatever the last map you were viewing when you last used MapSource Now, click on the map selection drop-down to view other maps that are installed.
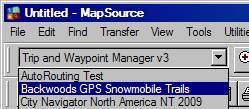
Figure 4: Map Selection drop-down list.
Note: If you do not see the dropdown list as depicted in figure 4, you may have disabled that toolbar element. In that case, either re-enable the toolbar, or use VIEW -> SWITCH TO PRODUCT from the menu to select our map.
You will notice that a new map has been added to the list. In this case, that new map is "Backwoods GPS Snowmobile Trails", or another map product that you just installed from BackWoodsGPtrails.com. Select that map to display it.
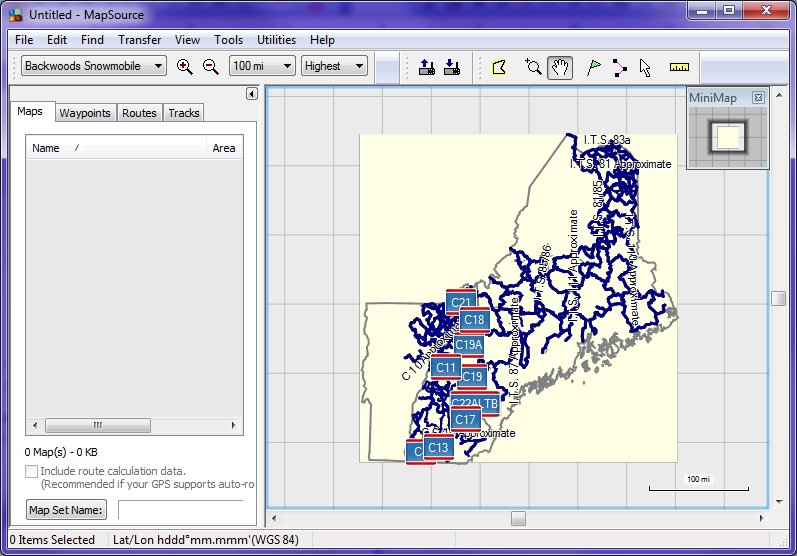
Figure 5: Snowmobile Map opened, zoomed to regional level.
As seen in Figure 5, a map rectangle becomes visible, depending how you were zoomed in the previous map display. If you do not see the map, or it is too small to view, use the Zoom Out Region function from the menu as shown in Figure 6 below..
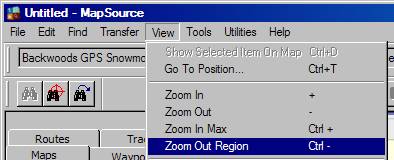
Figure 6: Zoom Out Region menu
When you are zoomed out to the regional level of the snowmobile trail map you will see an outline of the Maine, New Hampshire and Vermont state borders as depicted in Figure 7 .
Figure 7: Snowmobile trail map zoomed to regional level.
Selecting Maps for downloading to your handheld GPS
To select a section of the map for download to your GPS, click on the![]() map selection button, and then click on the Maps tab
map selection button, and then click on the Maps tab ![]() . MapSource will highlight several rectangular and irregular shaped grid sections on the map. Each of these sections can be selected for download to your GPS.
. MapSource will highlight several rectangular and irregular shaped grid sections on the map. Each of these sections can be selected for download to your GPS.
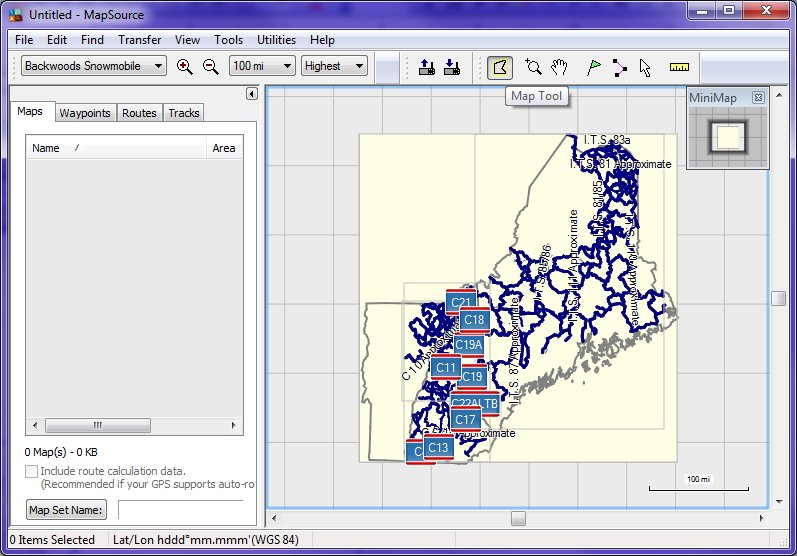
Figure 8: Snowmobile Map ready to select downloadable map sections
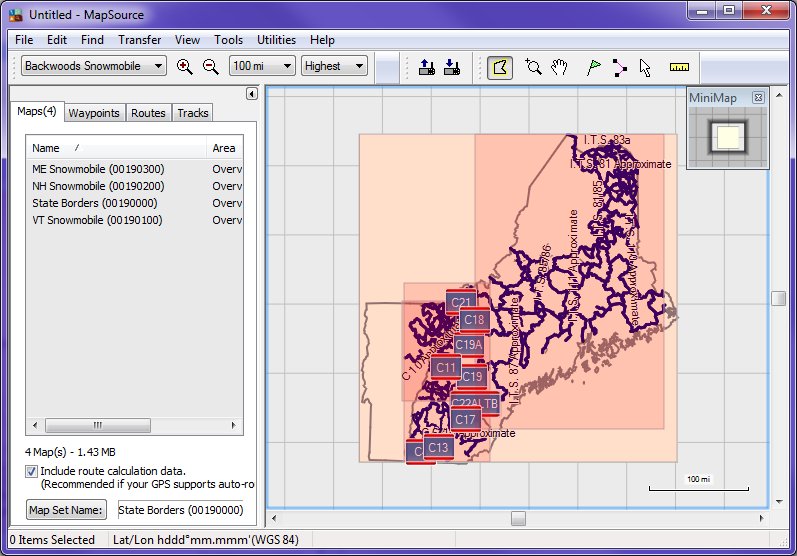
Figure 8a: Snowmobile Map with map sections selected
To select map sections for download to your GPS drag the![]() map selection button across the map or click on different map sections until the sections change color. When a map is selected, it will appear in the Maps tab on the left side of the screen.
map selection button across the map or click on different map sections until the sections change color. When a map is selected, it will appear in the Maps tab on the left side of the screen.
At this point, all you need to do to download the snowmobile trail map is to connect your GPS to your computer with a usb or serial cable, power it on and then click on the download button ![]() .
.
If you want to add addition maps to the list to download, you can do that now. For example, if you have the Free Game & Fish Network Topographic map topographicalmap, you may want to select it for download as depicted in Figure 9 below. First, select the NewEnglandtopo from the map selection drop-down Then use the ![]() map selection button, dragging it across the areas you want to select.
map selection button, dragging it across the areas you want to select.
Selecting additional maps for download (e.g. topographic maps)
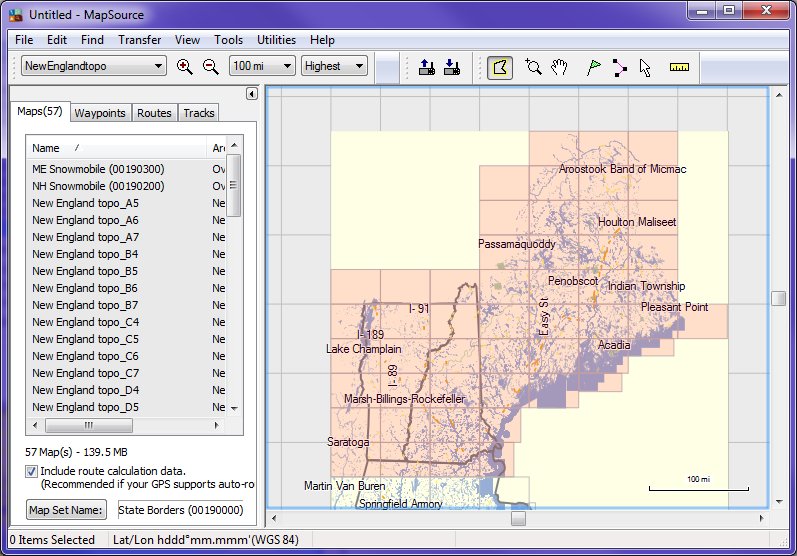
Figure 9: Selecting multiple map sections from Free Game & Fish Topo map.
The topographical maps you selected will be added to the Maps list on the left along with the Backwoods GPS Snowmobile Trails map that you added previously.

Figure 10: Several topographic maps are added to the list
Zooming in for more detail on maps
Select the Backwoods GPS Snowmobile Trail map from the drop-down, and then zoom in to have a closer look at the trails. For the most detail, set to the ![]() level of detail. Once you zoom down close enough, you should start to see POI's (points of interest, like gas stations, parking places etc.). Move your zoom or selection pointer tool to point at a map feature, such as a trail, or a POI icon. If you point at a trail, the trail will identify itself with a small popup window. So, if you pointed at a trail, it might identify itself as "Corridor 18" for a major corridor trail. Moving the pointer over a POI icon will also cause a small popup to appear.
level of detail. Once you zoom down close enough, you should start to see POI's (points of interest, like gas stations, parking places etc.). Move your zoom or selection pointer tool to point at a map feature, such as a trail, or a POI icon. If you point at a trail, the trail will identify itself with a small popup window. So, if you pointed at a trail, it might identify itself as "Corridor 18" for a major corridor trail. Moving the pointer over a POI icon will also cause a small popup to appear.
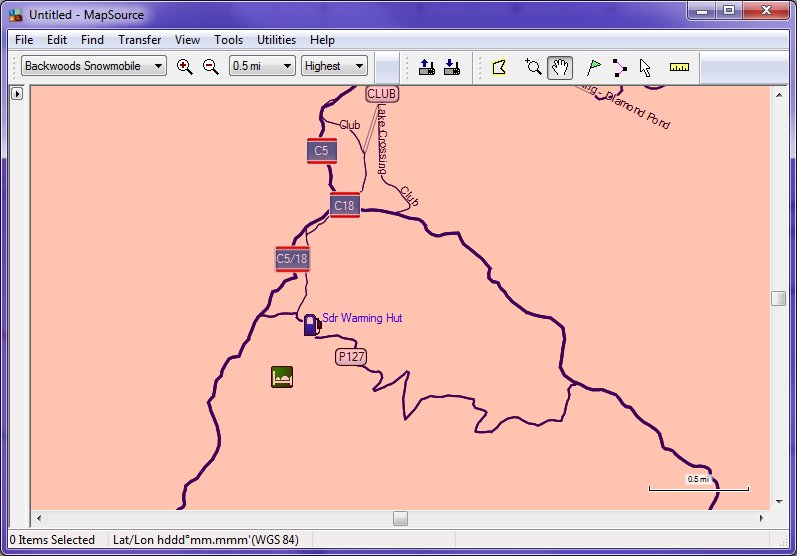
Figure 11: Map zoomed in for more detail.
Finding POI's (points of interest)
Use the selection icon ![]() to right click on the map surface and then select Find Nearest Places from the drop down menu.
to right click on the map surface and then select Find Nearest Places from the drop down menu.
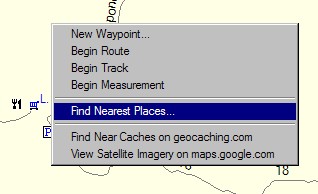
Figure 12: Finding nearby places menu
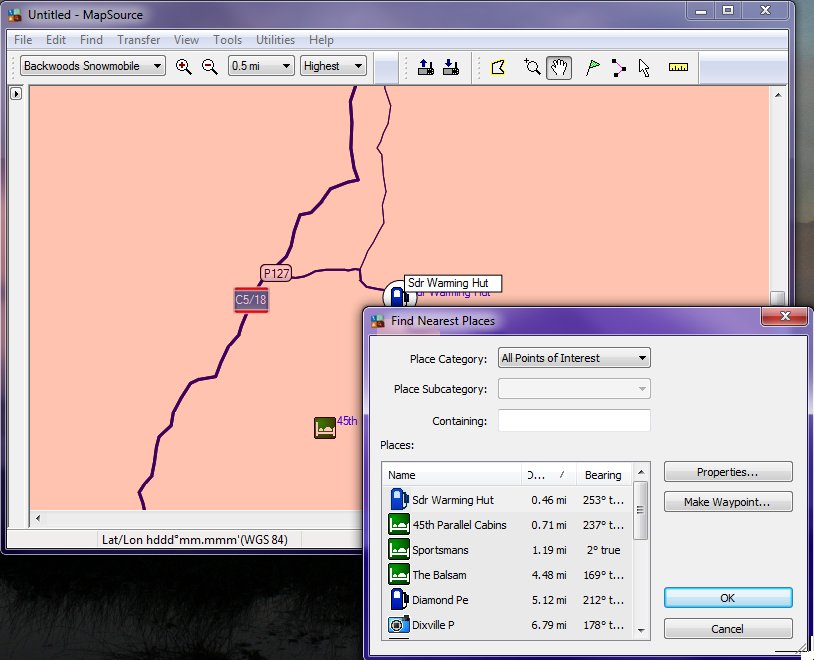
Figure 13: Finding places dialog box
Click on Make Waypoint button to create a new waypoint where that POI is located. Unlike POI's which are map specific, waypoints can be seen on any map loaded in MapSource (Waypoints can also be downloaded to your GPS). When you switch to a different map, you will still see the waypoint. This is a good way to correlate points on different maps (Figure 14 & FIgure 15).
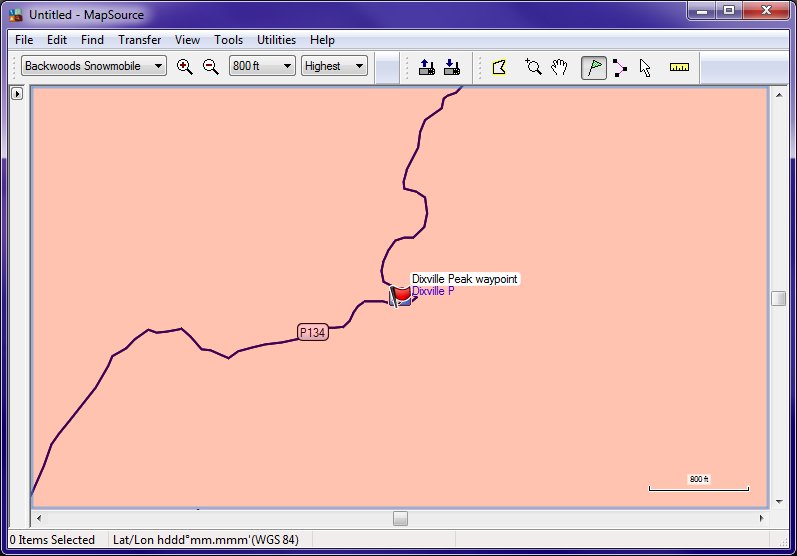
Figure 14: Waypoint shown on snowmobile map.
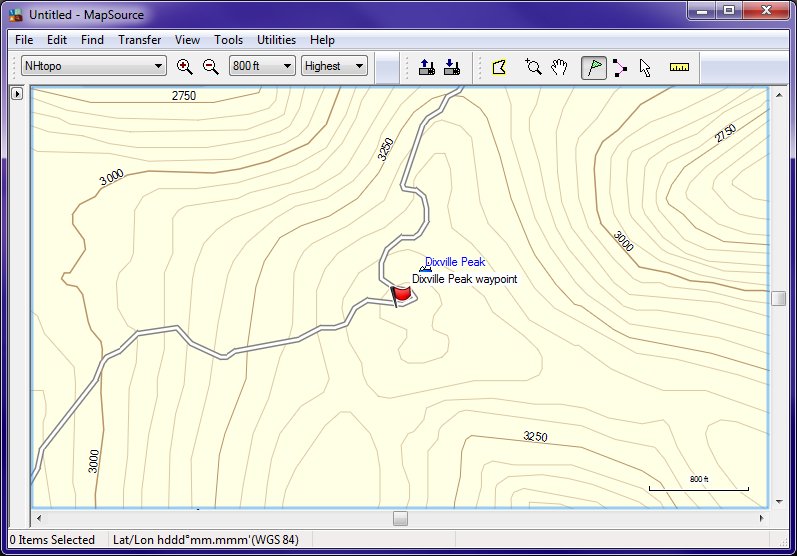
Figure 15: Same waypoint shown on another map
Sending Map information (maps, waypoints to your GPS)
Make sure your GPS is connected to your computer with either a usb or serial cable. Most newer GPS models use usb cables. Power on your GPS and give it some time to boot up.. Click on the download button , and select the items (maps, waypoints, routes, tracks) using checkboxes that you want to send. Use the device dropdown control to select the GPS device where you want to send the data. The GPSMap60csx GPS only supports downloading data to it's SD card. It contains no other memory.
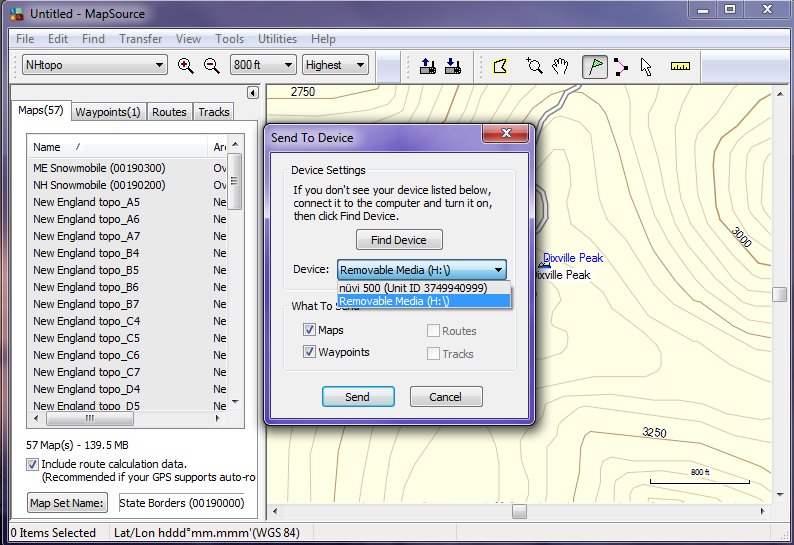
Figure 16: Selecting data and a GPS device to download to
Other GPS models such as the Nuvi 500 may have two storage device locations to send data to, main storage, and an optional micro-sd card. The device dropdown will allow you to select the device, main storage, or SD card. A Nuvi 500 main storage is identified by the words nuvi 500 (unit ID xxxxxxxxxx). The optional sd card on the Nuvi 500 will be the next highest drive letter (e.g. H:\). See figure 16 below. Click on Send to send (download) the data (maps, waypoints, etc.) to your GPS. Caution: Any map data on the device will be overwritten, but tracks, waypoints and routes will be added to the existing data. Built-in maps that came installed on your GPS will not be overwritten.

Figure 16: Selecting Nuvi 500 SD card device to send to
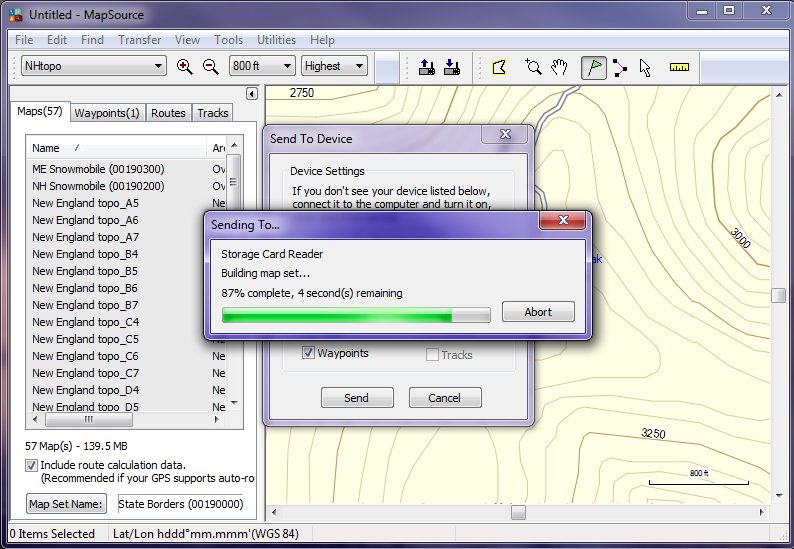
Once you click on the SEND button, a map is built, and then downloaded to your GPS. It can take several minutes to download, especially of you have a lot of maps selected. Downloading a pure snowmobile trail map is very fast, where downloading it with a log of topographic map detail can be very slow.
When you see 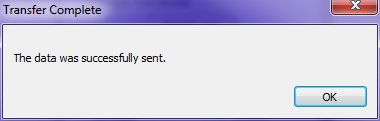 you are ready to start using the maps on your GPS!
You now have both a topographical map and a snowmobile trail map loaded on you GPS.